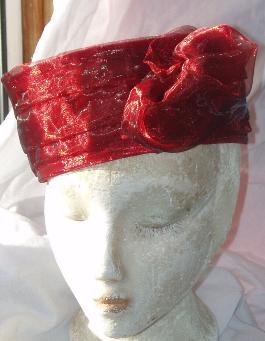
The construction is extremely simple: just cut a strip of whatever stiffening you're using, wrap it round your forehead to get the size, and then stick or staple the ends together as though you were making a paper crown.
The covering of this is a soft two-tone organza - it frays like nobody's business, so you have to make sure any raw edges are kept well tucked under. Because it's semi-transparent, I painted the stiffening red before I started.
The dangling left-over piece I just bunched up, taking care to keep raw edges well inside, and tacked it down when I had an arrangement I liked, to cover the join in the pleated part.
The top (it doesn't clash in real life as badly as it does in the photo!) I made in a similar way to the one in 'From hatband to hat', except that I also used a shape cut out of the stiffening. I just drew round the inside of the 'crown' shape, and cut out an oval slightly bigger.
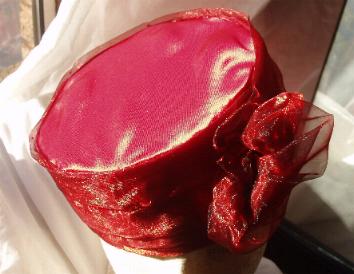
Then all I had to do was stick the top in place with fabric glue, neaten off the edges inside with petersham and there it was.